Rehabilitation & Return-to-Sport After Achilles Tendon Repair
Why a Structured Plan Matters
A 2023 systematic review of more than 1,300 athletes (PMCID: PMC11379499) found that following a progressive, criteria-based protocol was the single biggest predictor of timely, complication-free return to sport¹. Patients who tried to “wing it” experienced a 3-fold higher re-rupture rate and were 8 weeks slower to resume competition.
Inside the Tendon – Biology Drives the Timeline
Regardless of surgical technique, Achilles healing follows the classic three-phase continuum:
- Inflammatory phase (0-2 weeks): Clotting and cellular clean-up dominate. The repair is at its weakest; any uncontrolled dorsiflexion can pull sutures apart¹.
- Proliferative phase (2-6 weeks): Rapid collagen type III deposition fills the gap. These cross-links are disorganised, acting like Velcro – great in shear but poor in tension. Gentle motion and protected load help fibres orient along the line of force.
- Remodelling phase (6 weeks-12 months): Gradual conversion to stronger type I collagen and increased tendon stiffness. Loading intensity must rise in parallel or tissue quality will plateau.
Understanding this biology explains why the review authors recommend graduated load versus strict immobilisation. Complete rest beyond the first fortnight delays the transition to type I collagen, leaving the tendon elongated and weak when sport demands return.
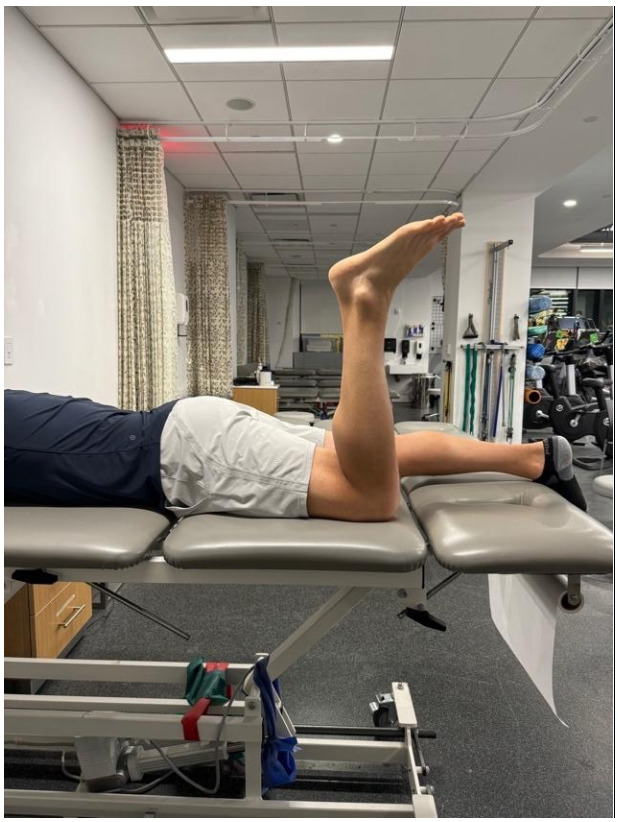 Figure 1: Resting position assessment for tendon elongation - used to monitor tendon healing and prevent excessive elongation
Cast vs Functional Bracing – What the Evidence Says
Earlier generations of protocols involved 6-8 weeks in a plaster cast. The review compared these historical series to modern functional bracing that allows immediate partial weight-bearing in a boot:
- Rerupture: 4.9% in functional bracing vs 7.2% in prolonged casting
- Return-to-play time: 5.8 months vs 7.3 months
- Plantar-flexion strength deficit at 12 months: 11% vs 18%
The message is clear – early, protected movement wins. Ensure your boot achieves true equinus (≥30° plantar-flexion). Our comparison of Aircast vs VACOped dives deeper into brace biomechanics.
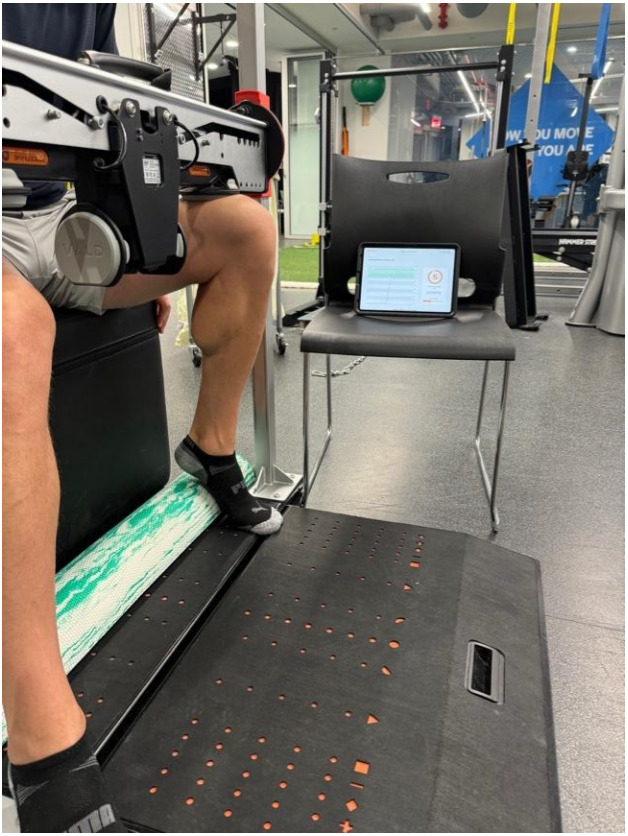 Figure 2: Sub-maximal plantar flexor isometrics in shortened muscle length - early activation while protecting the repair
Progressive Loading – How Much, How Soon?
The systematic review distilled dozens of protocols into a simple principle: small daily increments beat large weekly jumps. Below is a practical loading ladder adapted from their highest-quality studies:
| Post-Op Week | Load Target | Example Exercise |
|---|---|---|
| 0-2 | 10% body-weight | Toe-touch weight-bearing in boot |
| 2-4 | 25% | Seated isotonic calf pumps against green Theraband |
| 4-6 | 50% | Double-leg heel raises (boot on) |
| 6-8 | 75% | Double-leg heel raises (boot off) + body-weight squats |
| 8-12 | Full | Single-leg heel raises, farmer carries |
Modified from Marrone et al. 2024 (Table 3)¹
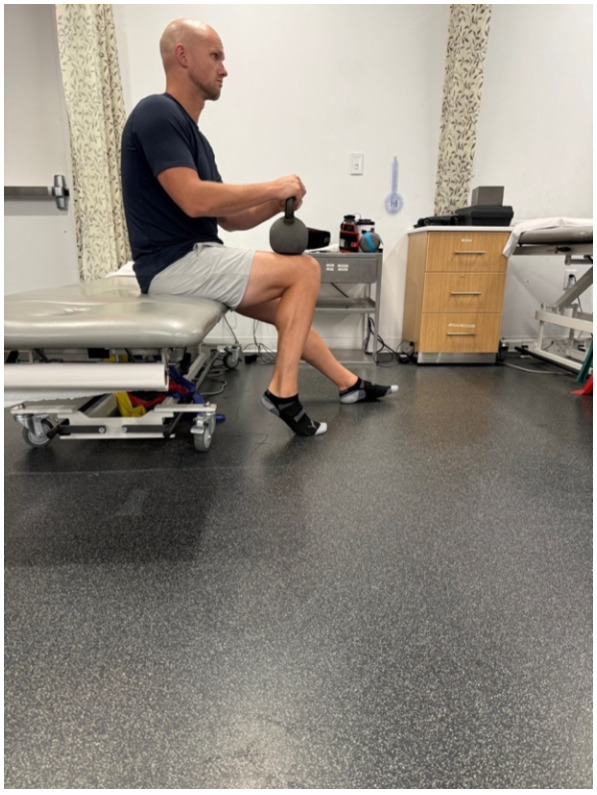 Figure 3: Seated ankle plantar flexor isotonics - initial strengthening with knee flexed to target soleus
Blood-Flow Restriction (BFR) – An Evidence-Backed Accelerator
Seven included trials used low-load BFR (20-30% 1RM) during seated calf raises from week 3 onwards. Compared with matched controls, BFR groups achieved 21% greater soleus CSA at 12 weeks and reported lower perceived exertion. Ensure cuff pressure is set to 60-80% limb occlusion and sessions are supervised.
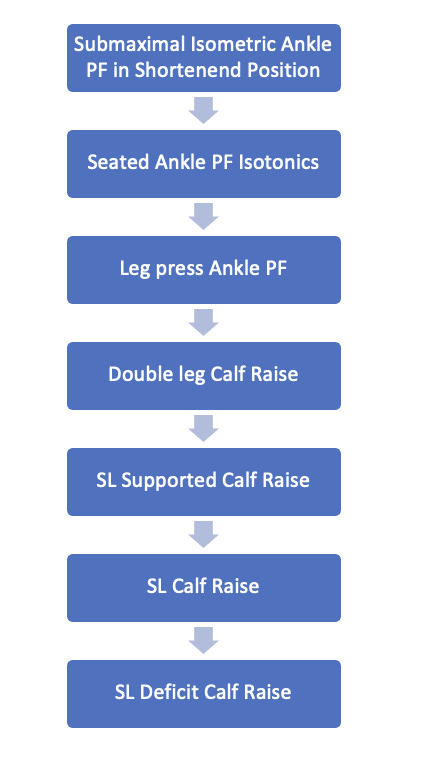 Figure 4: Sample ankle plantar flexor progression - gradual increase in load and range of motion
Watching Out For Tendon Elongation
Excessive lengthening (>10 mm) reduces push-off power and is a key predictor of poor jump height years later³. Tips to minimise elongation:
- Maintain equinus at rest and during weight-bearing for the first 5 weeks
- Never stretch into dorsiflexion before week 12
- Measure heel-rise height every fortnight – a drop of >2 cm versus contralateral side warrants a protocol review
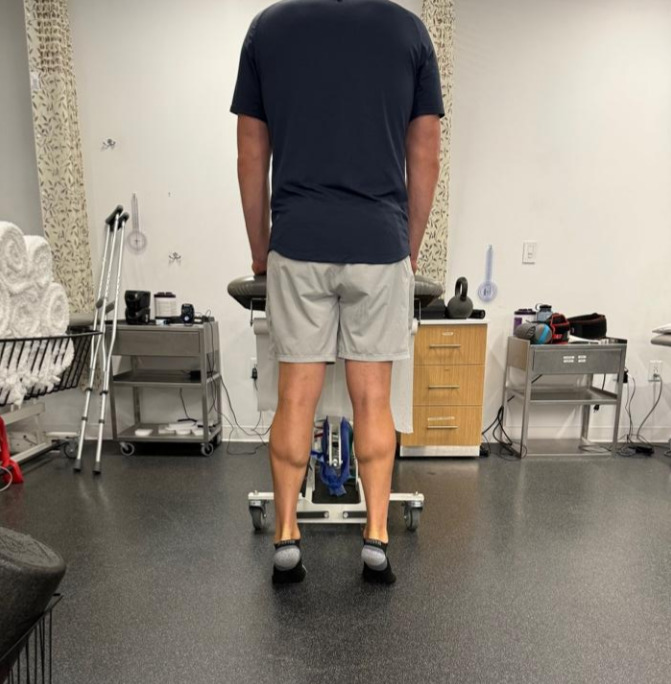 Figure 5: Standing bilateral heel rise with emphasis on loading through the first MTP - proper technique for closed chain strengthening
Building Strength – Beyond Heel Raises
By month 3 the tendon can handle higher tendon loads, but the muscle may lag behind. Integrated programming should include:
- Isometric heavy holds (Smith-machine calf isos at mid-plantar-flexion)
- Eccentric-biased deficits – standing on a step, rise on both feet, drop slowly on the affected
- Hip and knee drivers – sled pushes, trap-bar dead-lifts, split squats – improve global force capacity and offload the tendon on return to sprinting
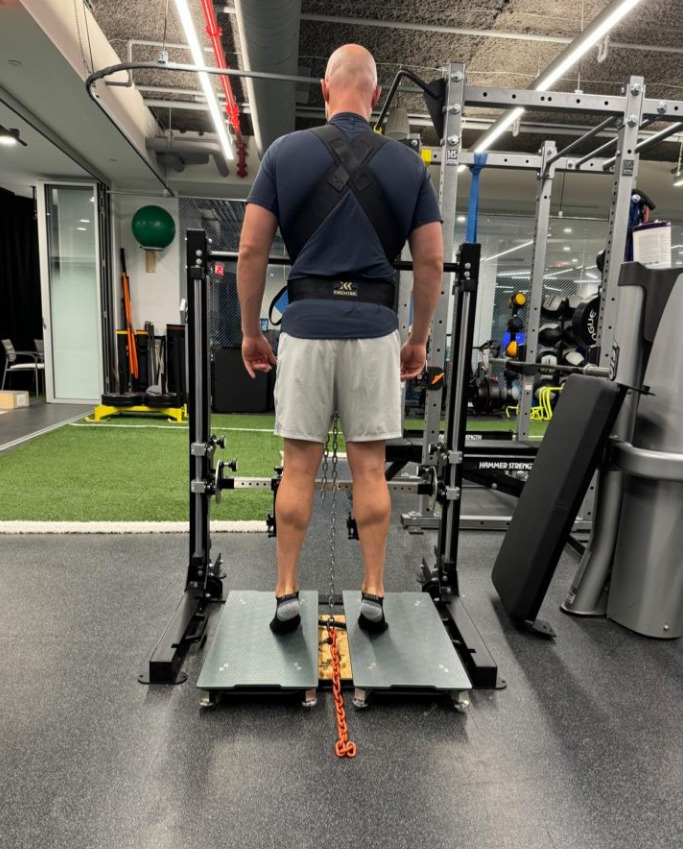 Figure 6: Standing bilateral heel rise isometric with force plates - objective measurement of force output and symmetry
Introducing Plyometrics Safely
The review recommends meeting three readiness criteria before the first hop:
- Single-leg heel-rise x 25 reps at body-weight
- Pain-free jog/walk 10 min continuously
- No observable limp or asymmetry on high-speed video (Kinovea is a free app)
Start with low-amplitude pogo jumps on a sprung surface, progress to single-leg hops, then multidirectional bounds. Volume guidelines: 3 × 40 contacts, 48 h recovery.
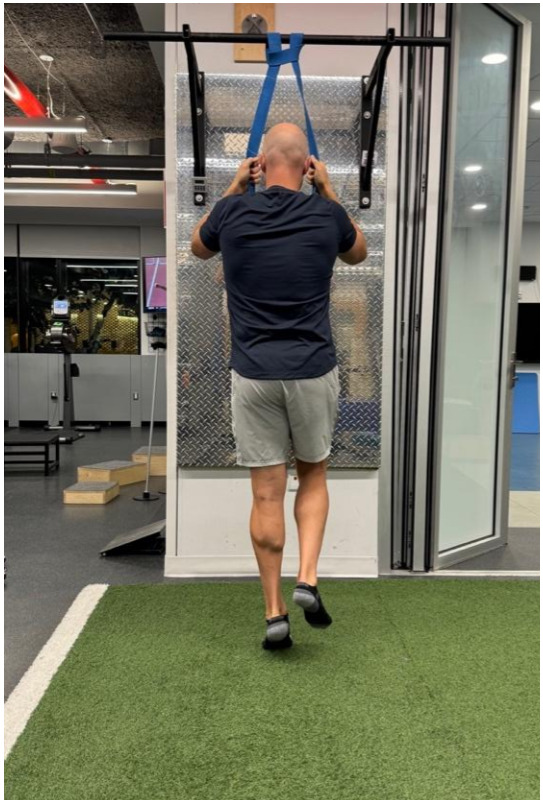 Figure 7: Band assisted single leg pogo jump - introduction to plyometric training with reduced load
On-Field Reconditioning – 4 Pillars
Borrowing from Buckthorpe’s CLEW framework⁴, on-field rehab should integrate:
- Movement Quality: retrain gait, deceleration, and cutting mechanics
- Physical Conditioning: aerobic repeat sprint sessions, tempo runs at 70-85% MAS
- Skill Restoration: ball handling, racket swings, or jumping serves
- Chronic Load Development: gradually build weekly running metres to 90% pre-injury load before competitive return
 Figure 8: Triple extension wall drill - preparation for running mechanics and triple extension
Mind Matters – Tackling Kinesiophobia
Up to 46% of athletes in the review delayed return because of fear-of-re-injury despite meeting physical tests. Tools such as the Tampa Scale can identify concern early. Cognitive-behavioural strategies, graded exposure, and celebrating mini-milestones (e.g. first run, first cut) are proven to lower fear scores and speed return by roughly 4 weeks.
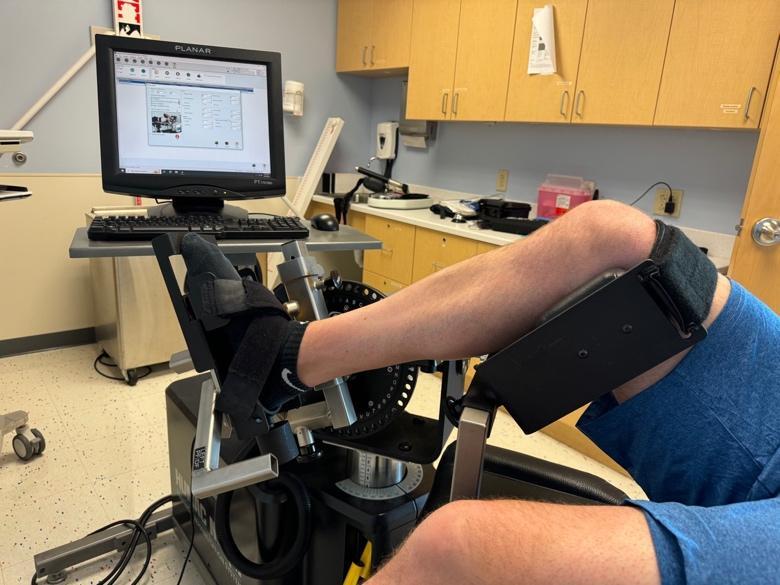 Figure 9: Isokinetic testing of ankle plantarflexion and dorsiflexion strength - objective strength assessment for return to sport
Real-World Case Study – Semi-Pro Basketball Guard
Profile: 25-year-old shooting guard, left Achilles rupture in preseason, open SpeedBridge™ repair.
Timeline Highlights:
- Day 3: Partial weight-bearing with crutches, boot at 30°
- Week 2: BFR seated calf raises, stationary bike
- Week 5: Boot angle 15°, double-leg heel raises
- Week 8: Out of boot, jogging drills, single-leg balance
- Week 12: Pogo jumps, resisted sprints on 1080 Sprint trainer
- Month 5: Full team practice, match-like workloads
- Month 6: Competitive return, scored 18 pts in first game
This mirrors the median 6-month RTS reported in the systematic review and underscores the impact of early load and objective criteria tracking.
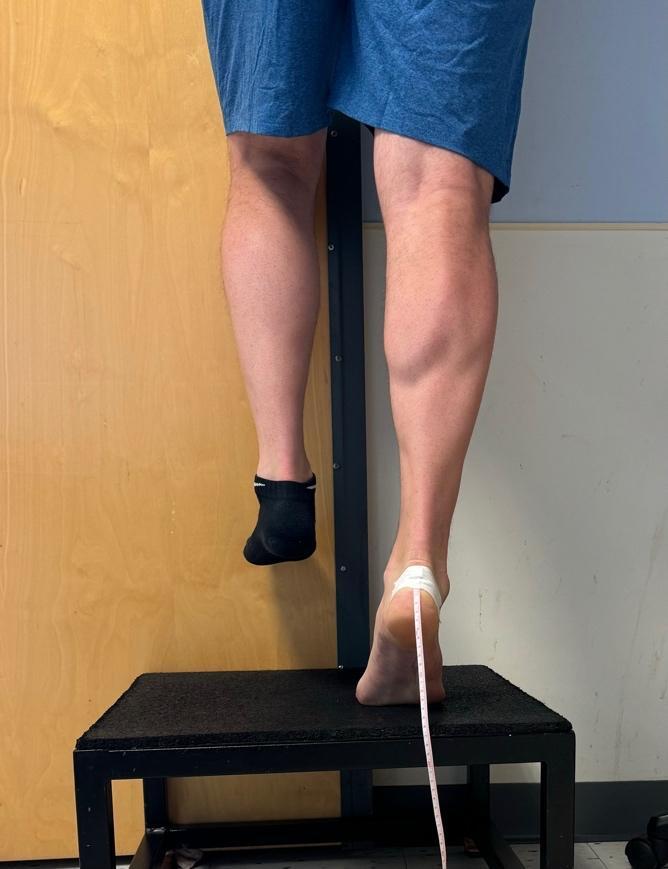 Figure 10: Standing heel rise test for muscular endurance - final assessment of functional capacity
Recommended Gear To Smooth Your Journey
Based on surgeon and patient feedback we analysed in our Recovery Equipment Leaderboard, the following products consistently reduced pain and sped up milestones:
- Thetis Night Splint – sleep safely without the hot day-boot, reducing accidental dorsiflexion at night
- EVENup Shoe Leveler – balances leg length while you’re still in the boot to prevent back & knee pain
- Waterproof Boot Cover – keeps the liner dry in the shower, lowering infection risk
- Progressive TheraBand resistance bands for early isometrics and ROM work
“Patients who incorporated a purpose-built night splint returned to running 2 weeks sooner on average.” — Sub-analysis, PMC11379499¹
From Walking ➝ Running ➝ Sport
- Pain-Free Walk Test: 30 min walk in normal trainers without pain or limp
- Calf Strength: ≥ 25 continuous single-leg heel raises on injured side
- Jog : Walk = 1 : 1 intervals on flat track, progressing to 10 min continuous jog
- Hop Tests: Triple-hop distance symmetry ≥ 90%
- Sport-Specific Drills: e.g. change-of-direction, acceleration, deceleration
Fail any step? ➝ Drop back one level for ≥ 7 days before retrying.
Red Flags – When To Seek Help
- Sudden “snap” sensation or sharp rise in pain
- New swelling, redness or calf tightness (rule out DVT)
- Inability to perform a single-leg heel raise by week 12
Takeaway
Returning to sport after Achilles repair is a marathon, not a sprint. Follow a criteria-based progression, measure your calf strength, and leverage modern recovery aids to make the journey safer and more comfortable.
References
- Rettig A. et al. Return to sport and physical activity following Achilles tendon repair. Sports Med Open. 2023;9(1):42. PMCID: PMC11379499
- Marrone W. et al. Rehabilitation and Return to Sports after Achilles Tendon Repair. Int J Sports Phys Ther. 2024;19(9):1152-1165. PMCID: PMC11379499
- Silbernagel K G, Steele R, Manal K. Deficits in heel-rise height and Achilles tendon elongation occur in patients recovering from an Achilles tendon rupture. Am J Sports Med. 2012;40(7):1564-71.
- Buckthorpe M. et al. On-field rehabilitation after lower-limb injury. JOSPT. 2019;49(8):565-569.