How to Prevent Achilles Tendon Re-Rupture
How to Prevent Achilles Tendon Re-Rupture
Preventing an Achilles tendon re-rupture requires careful rehabilitation, gradual activity progression, and attention to lifestyle changes. Here’s what you need to know:
- Re-Rupture Risk: Surgical patients face about a 3.7% risk, while non-surgical patients see a higher 9.8% risk.
- Key Causes: Returning to high-impact activities too soon, poor rehab compliance, and improper use of orthopedic boots are major risks.
- Rehabilitation Stages:
- Early Phase (1–6 weeks): Focus on pain reduction and gentle range-of-motion exercises.
- Intermediate Phase (6–12 weeks): Gradually build strength with controlled exercises like double-leg calf raises and eccentric movements.
- Advanced Phase (12+ weeks): Prepare for high-impact activities with single-leg exercises, plyometrics, and sport-specific drills.
- Lifestyle Adjustments: Maintain a diet rich in protein and collagen, stay hydrated, wear supportive footwear, and avoid rushing back into intense activities.
Quick Comparison: Orthopedic Boots
| Feature | Aircast Boot | VACOped Boot |
|---|---|---|
| Mechanism | Fixed wedges | Hinged, adjustable |
| Cost | $150 (+$25 wedges) | $375 |
| Best for | Budget-friendly | Active recovery |
| Waterproof | No | Yes |
| Walking Gait | May cause lurching | More natural |
Takeaway: Recovery is a long-term process. Stick to a structured rehab plan, gradually increase activity, and make healthy choices to reduce the risk of re-rupture.
Achilles Tendon Re-Rupture Risk Factors
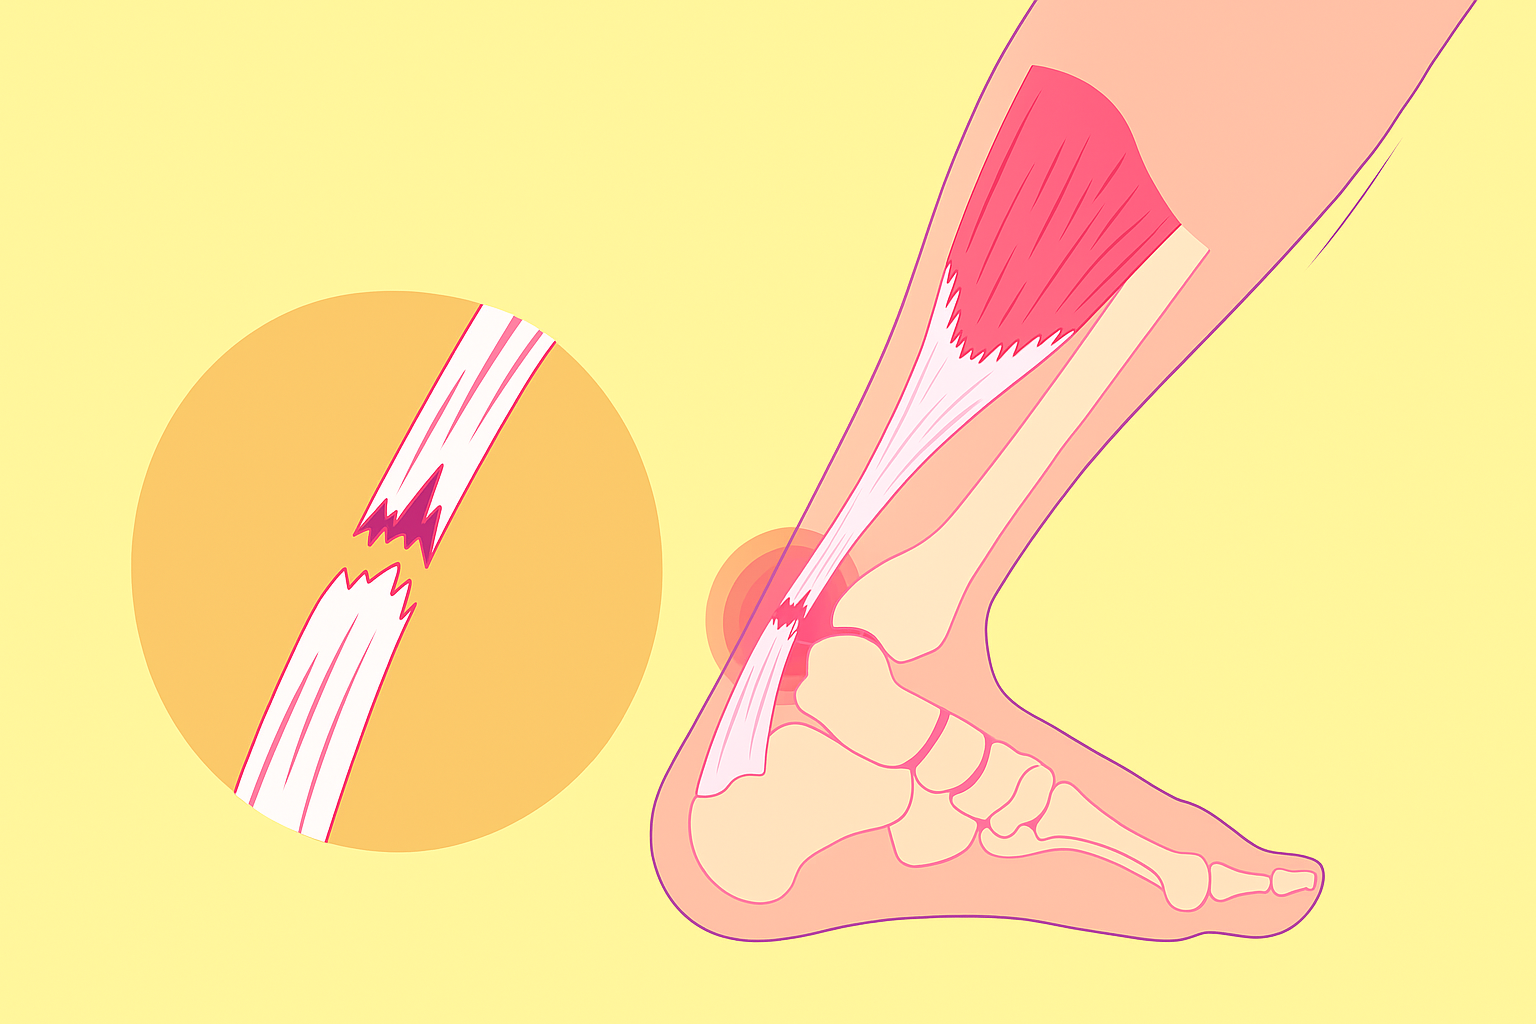
An Achilles tendon re-rupture happens when the tendon tears again after starting to heal. This setback is one of the most serious complications during recovery and often requires surgery to fix.
Knowing what increases the chances of re-rupture is critical to safeguarding your healing tendon. Missteps during recovery can erase months of progress and set you back to square one.
The Healing Timeline: A Key Factor
Recovering from an Achilles tendon injury takes time, and the process varies depending on factors like age, overall health, and how severe the original injury was [2]. While many recovery plans aim for a return to sports in six months, full recovery can take a year or more [3]. Even after six months, many patients still experience limitations in their activities [3].
As you start to feel better, it’s tempting to push your limits. However, the tendon might still be healing internally, even if it feels fine externally. This is why controlled and gradual rehabilitation is so important.
Major Risk Factors for Re-Rupture
The biggest risk factor for re-rupture is going back to high-impact activities too soon. While your tendon might feel strong enough for daily activities early in recovery, it’s not ready to handle the intense forces of sports. For instance, during sports, the Achilles tendon can experience forces up to 11 times your body weight - and even higher during activities like gymnastics landings, where it can reach 15 times your body weight [4].
Another key risk is poor rehabilitation compliance. Skipping physical therapy, neglecting prescribed exercises, or not following instructions for wearing a protective boot can all increase the chances of re-rupture. As Thetis Medical puts it:
“Each week sees you closer to the finish. But one small mistake is like landing on the big snake that takes you right back to the beginning, with a re-rupture.” [3]
Improper Boot Usage in the first 10 weeks is also a significant concern. Wearing the boot correctly during this critical period helps protect the tendon. Removing it too often or using it incorrectly can leave the tendon vulnerable.
Demographic and Medical Risk Patterns
A study of 43,287 patients revealed certain groups are at higher risk for re-rupture. Men, younger individuals, and those with a history of Achilles tendinopathy are more likely to experience re-ruptures in the short term [5]. For those undergoing surgery, the short-term re-rupture rate is 2.14% [5]. Additionally, up to 46% of people who rupture their Achilles tendon have a history of tendon pain or tendinopathy, which makes the tissue more fragile during recovery [6].
Recognizing Warning Signs
Paying attention to how your tendon responds during rehab can help you catch potential problems early. For example, a sudden increase in dorsiflexion (the upward movement of your foot) should prompt an immediate call to your surgeon. This could indicate excessive tendon elongation, which raises the risk of re-rupture.
Similarly, an unexpected loss of tightness in the early phases of recovery can be a red flag. While some tightness is normal and signals appropriate tendon elongation [6], a sudden disappearance of this sensation might mean the tendon is stretching too much, too quickly.
The Importance of Gradual Progression
Spotting these warning signs emphasizes the necessity of slowly increasing activity levels. Gradual progression allows the tendon to adapt and grow stronger over time. Jumping straight from light activity to high-impact sports puts too much stress on the healing tissue, potentially leading to a re-rupture.
This principle doesn’t just apply to formal exercises - it’s also relevant for everyday activities. Whether it’s walking farther, climbing more stairs, or standing for longer periods, it’s important to increase your activity level step by step.
The statistics highlight why this approach matters. Achilles tendon ruptures make up 10.7% of all tendon and ligament injuries, with about 8 cases per 100,000 people each year [4]. Managing risks carefully during recovery is essential for avoiding re-rupture and achieving lasting results.
Rehabilitation Protocols Based on Research
Recovering from a tendon injury or surgery requires a well-structured plan rooted in evidence. These rehabilitation protocols are designed to guide healing, rebuild strength, and reduce the chance of re-rupture. They align with the natural healing phases of tendon tissue, ensuring each stage of recovery builds upon the last.
Rehabilitation is typically divided into three stages - acute, intermediate, and advanced - mirroring the tendon’s biological healing process. Tendons heal in three phases: the Acute Inflammatory Phase (lasting 1–2 weeks), the Proliferative Phase (up to 4 weeks), and the Remodeling Phase (which can extend beyond 18 months) [4]. Each stage of rehabilitation aligns with these phases, promoting recovery while safeguarding the tendon.
Early Phase: Restoring Range of Motion
In the early weeks after injury or surgery, the focus is on reducing pain and swelling while gently reintroducing movement. This phase prioritizes protecting the healing tendon while maintaining joint mobility.
Passive range of motion exercises are the cornerstone of this stage. These exercises involve assisted movements, either guided by a physical therapist or using the uninjured leg to move the affected ankle. The aim is to keep the joint mobile without engaging the calf muscles, which could strain the tendon.
One simple yet effective exercise is ankle pumps. While lying down with your leg elevated, slowly flex your foot up and down within a comfortable range. This gentle movement improves blood circulation without stressing the tendon. Another option is tracing letters in the air with your toes to improve mobility in multiple directions.
Each movement should be slow and deliberate - about three seconds per motion. Performing 15 repetitions up to three times a day is generally recommended [7]. Communication with your surgeon during this phase is vital, as factors like surgical technique and tissue quality influence the progression of weight-bearing and range of motion [4].
Intermediate Phase: Building Strength
The intermediate phase begins around 6–12 weeks post-injury, once basic range of motion is restored, and weight-bearing feels comfortable. The goal here is to gradually build strength while improving flexibility.
Start with double-leg calf raises. Stand with both feet flat, then slowly rise onto your toes, focusing on controlled movements both up and down. If needed, use a wall or chair for balance. As strength improves, progress to heavy slow resistance (HSR) training, which involves performing slow, controlled movements with heavier loads (over 75% of your maximum effort) [8]. This might mean starting with bodyweight exercises and gradually adding weights.
Eccentric exercises are particularly effective during this phase. For example, rise onto your toes with both legs, then slowly lower yourself down using only the injured leg over 3–5 seconds. These exercises help the tendon adapt to increased loads [9].
Progressive overload is key - gradually increase the intensity and load as your strength improves [8]. Aim to support 1.5 times your body weight during double-leg exercises. Monitor pain levels using the Pain and Activity Modification Scale: pain levels of 4 or less mean you can continue, 4–6 suggest caution, and anything above 6 indicates you should stop and reassess [8].
This phase also addresses walking patterns. Early compensations can lead to long-term issues, so normalizing your gait is essential. By building strength and resilience in a controlled manner, this phase lays the groundwork for more demanding activities.
Advanced Phase: Preparing for High-Impact Activities
The advanced phase focuses on preparing for sports or other high-intensity activities. This stage typically starts around 12–16 weeks post-injury, with progression based on functional milestones rather than time alone [11].
Single-leg exercises take center stage here. Single-leg calf raises, for example, challenge strength, balance, and proprioception. Begin with partial range of motion and gradually progress to a full range as strength improves. The goal is to support at least 70% of your body weight on the injured leg [8].
Plyometric exercises introduce explosive movements essential for sports. Start with simple double-leg hops, emphasizing soft landings and controlled takeoffs. Progress to single-leg hops, lateral hops, box jumps, and sport-specific drills. Gradual progression is critical to allow the tendon to adapt to these higher forces.
Functional exercises tailored to your goals become increasingly important. For example, tennis players might practice lateral movements and quick changes in direction, while runners focus on refining mechanics and gradually increasing distance and speed.
Strength benchmarks help determine readiness for a return to sport. These include achieving isokinetic and isometric strength greater than 90% limb symmetry and supporting 2.5–3.0 times your body weight during seated calf isometric exercises [10]. Jump tests also provide valuable insights: double-leg and single-leg jump asymmetries should be less than 20% [10].
Patience is key during this phase, as tendons require consistent loading over 3–6 months to adapt fully [8]. Rushing can increase the risk of re-rupture. Completing a plyometric progression and a return-to-run program are important milestones before resuming unrestricted activities [10]. A qualified physical therapist should oversee this phase to ensure your movements are safe and effective.
Gradual Load Progression and Activity Return
Recovering from a tendon injury and transitioning from basic walking to full running requires a careful, step-by-step approach. Rushing this process can lead to setbacks, including a higher risk of re-rupture, so it’s crucial to track your progress and listen to your body. Here’s how this gradual progression typically unfolds.
A structured six-month recovery plan usually starts with gentle circulation exercises during the first two weeks, progresses to strength training and light jogging by around 12 weeks, and incorporates maintenance exercises with resistance by the six-month mark [14].
Start with Pain-Free Walking
Your first goal should be walking without pain. If walking is uncomfortable, begin with lower-impact exercises like standing calf raises, lunges, or step-ups until walking feels natural and pain-free [15][13]. Once you can walk comfortably, gradually increase your walking distance and duration.
Building Strength for Jogging
Before you start jogging, it’s essential to meet specific strength milestones. Exercises like single-leg hops or drop jumps can help assess your readiness. If these activities cause discomfort or your form starts to falter, return to intermediate strength-building exercises [15]. Remember, post-exercise pain should subside by the next morning. If pain lingers or worsens over weeks, scale back your activity level [17]. In the meantime, low-impact alternatives like swimming or cycling can help maintain your cardiovascular fitness without overloading your healing tendon [12].
Customizing Your Recovery Plan
Recovery isn’t one-size-fits-all. A physical therapist can create a plan tailored to your goals while using tools like gait analysis to address any uneven movement patterns that might strain your tendon [19][18]. They’ll also help you monitor pain levels using a scale - mild discomfort (2–3 out of 10) during activity is generally acceptable as long as it fades quickly. Early on, you’ll likely be advised to avoid running on consecutive days [18].
Addressing Biomechanical Issues
Manual therapy can help reduce pain, inflammation, and imbalances, such as weak glutes or poor motor control, which could negatively impact your running mechanics [20]. Regular check-ins with healthcare professionals, including orthopedic specialists and physical therapists, are vital for adjusting your rehab plan as you progress [16].
As you begin to increase your activity levels, managing your workload becomes even more important. A physical therapist can guide you in balancing your training load and recognizing the difference between normal recovery sensations and warning signs of potential problems [20].
Progression Is Individualized
There’s no universal timeline for recovery - it varies from person to person. What matters most is consistent monitoring, gradual increases in activity, and professional guidance to ensure you’re moving forward safely and effectively.
Orthopedic Boots, Braces, and Mobility Aids
As you move through your rehabilitation, using the right devices to protect your healing tendon is crucial. Along with gradually increasing the load on your tendon, orthopedic devices play a key role in safeguarding it during recovery.
Orthopedic boots and braces are designed to keep the ankle stable and manage load progression, significantly reducing the risk of re-rupture. Walking boots, for instance, support early weight-bearing, offering a safer alternative to traditional immobilization methods. These boots not only help the tendon heal at the correct length but also minimize strain on the recovering tissue, which can lead to better early functional outcomes [22][25].
Achilles tendon braces provide additional benefits by offering compressive support. This can ease strain and improve blood flow around the injured area [24]. Research shows that patients using these braces often experience less pain and disability, allowing them to resume activities sooner while also lowering the risk of re-injury [24].
Understanding how different boot mechanisms function is key to effective protection. Rehabilitation protocols often require maintaining an equinus position (pointing the toes downward) to support proper healing [22]. Some boots come with fixed wedges, while others feature adjustable settings that adapt as your recovery progresses.
Using a shoe balancer alongside a walking boot can help equalize leg length, encouraging a natural walking pattern and reducing strain on your hips and lower back [27]. For comprehensive support, many experts recommend pairing a resting brace with one designed for activity [24]. This combination can enhance your overall recovery plan.
Advancements in boot technology have brought re-rupture rates down to below 5% [26]. Research highlights that softshell wedge boots can reduce tendon loading by 79.5%, hardshell wedge boots by 67.7%, and hardshell posterior strut boots by 53.4% [26].
“The choice between Aircast and VACOped should be based on the patient’s specific needs, lifestyle, and recovery goals. While the VACOped may offer some biomechanical advantages, the Aircast remains a practical choice for many patients due to its ease of use and cost-effectiveness. Consider factors such as driving requirements, budget constraints, and access to clinical support when making your decision.”
– Dr. Sarah Thompson, Consultant Orthopedic Surgeon [23]
Orthopedic Boot Comparison Table
Here’s a side-by-side look at two of the most commonly prescribed boots:
| Feature | Aircast Boot | VACOped Boot |
|---|---|---|
| Mechanism | Fixed wedges | Hinged, range of motion |
| Cost | $150 (+$25 for wedges) | $375 |
| Best for | Cost-sensitive patients | Highly active patients |
| Ankle Position | 28° plantarflexion | 48° plantarflexion |
| Walking Gait | May cause lurching | More natural movement |
| Muscle Preservation | Lower | Higher |
| Waterproof | No (requires cover) | Yes (with liner modification) |
| Adjustability | Simple wedge changes | More complex but precise |
| Availability | Widely available | Limited to select practices |
The VACOped boot stands out for its vacuum-bead liner, which helps prevent pressure sores, while the Aircast relies on air bladders that may exert pressure on the wound site [22]. Additionally, the VACOped’s articulating ankle feature supports a smoother, more natural gait as you progress in your recovery.
Cost is another important factor. With a price difference of about $225, the Aircast is a more budget-friendly option [23]. However, for those aiming to return to sports or physically demanding activities, the VACOped’s range of motion and enhanced mobility might justify the higher cost [23].
It’s worth noting that both boots can impact your ability to drive. That said, the Aircast’s lighter weight might make it slightly easier to manage in this regard [23].
Lifestyle Changes for Long-Term Tendon Health
Maintaining the health of your tendons, especially the Achilles tendon, requires more than just clinical rehabilitation. Everyday decisions about what you eat, how you exercise, and even the shoes you wear can have a big impact on tendon healing and reducing the risk of re-injury. Here’s a breakdown of lifestyle adjustments that can support long-term tendon recovery.
Nutrition for Tendon Healing
What you eat plays a crucial role in tendon repair. Ensuring you consume enough calories is essential for the healing process, while protein helps rebuild and strengthen tissues. A good target is 1–1.2 grams of protein per kilogram of body weight daily, spread out with about 15–20 grams per meal [28].
Supplements and Foods That Help
Certain supplements and foods can give your tendons an extra boost. For instance, taking 15–25 grams of hydrolyzed collagen with vitamin C about 45–60 minutes before exercise can enhance tendon repair [28]. Adding turmeric to your diet may also help reduce inflammation. Other nutrients like glucosamine, chondroitin, omega-3 fatty acids, and vitamins C, D, and K, along with minerals like copper and zinc, are beneficial for tendon health [28].
For better blood flow to the injured area, try drinking 400–500 ml of beetroot juice (made from two medium-sized beets) 2–3 hours before training. A colorful diet rich in fruits, vegetables, nuts, and seeds can further ensure you’re meeting your micronutrient needs.
Stay Hydrated
Hydration is key for keeping your tendons healthy. Drinking 64–80 ounces (8–10 glasses) of water daily helps improve circulation, deliver nutrients, and flush out waste. Cutting back on excessive caffeine and alcohol can also aid recovery [29].
Exercise Wisely
Even outside of formal rehab sessions, the exercises you choose can make a difference. Low-impact activities are great for maintaining cardiovascular fitness while protecting your Achilles tendon. Stationary biking is an excellent option - just make sure your saddle and shoes are adjusted to avoid putting pressure on the injured area. Swimming offers another low-impact alternative, though it might not always be convenient. Elliptical training can also be effective, especially in the later stages of recovery, as long as you monitor how your tendon responds [21][30].
Footwear Matters
The shoes you wear can either protect or strain your tendons. Look for footwear with good heel cushioning and firm arch support to minimize tension on your Achilles tendon [32][33]. Replace shoes regularly - about every three months - and prioritize those with cushioned heels, stable soles, and proper arch support [1][31][34]. If your shoes don’t provide enough support, consider using heel lifts or inserts to adjust your foot mechanics and reduce tendon stress [32][34].
Keep Your Weight in Check
Carrying extra weight can put unnecessary strain on your Achilles tendon, slowing recovery and increasing the risk of re-rupture. Working with a nutritionist can help you find the right balance of calories to support healing while maintaining a healthy weight [28].
Common Mistakes and How to Avoid Them
Recovering from an Achilles tendon rupture requires a delicate balance. Even small missteps during rehabilitation can slow progress or increase the risk of re-injury. Below, we’ll cover some common pitfalls and how to steer clear of them, helping you stay on track during your recovery journey.
Rushing Back to Activity
One of the biggest mistakes is returning to sports or high-impact activities too soon. Feeling better might tempt you to jump back in, but your tendon may not be ready to handle the stress. To avoid this, stick to your physical therapist’s timeline and rely on objective tests rather than just how you feel. These tests assess strength, range of motion, and how your tendon responds to stress, ensuring you’re ready for the next phase of activity.
Ignoring Pain Signals
Pushing through pain might seem like a sign of determination, but it can actually be a red flag. Pain often signals that your tendon is being overloaded. Pay attention to discomfort during and up to 48 hours after exercise. If pain or swelling increases, scale back your activity. Stony Brook Medicine emphasizes the importance of listening to your body - don’t ignore what it’s telling you.
Balancing Rest and Activity
Both extremes - too much rest or jumping back into full activity - can be harmful. Excessive rest leads to stiffness and weakness, while resuming full activity prematurely can strain your tendon. The key is gradual progression. Work closely with your physical therapist to strike the right balance, reintroducing activity while protecting your healing tendon.
Overlooking Simple Pain Relief
Some people either skip pain relief altogether or jump straight to invasive treatments. Start with simple methods like ice packs, anti-inflammatory creams, or heel lifts. These can often provide effective relief early on. Reserve invasive treatments as a last resort, and always combine them with your prescribed exercise plan.
Stretching Too Soon
Stretching might seem like a good idea, but doing it too early can harm your Achilles tendon. Until your physical therapist gives the green light, avoid stretching the tendon. Instead, try alternatives like massage, foam rolling, or using a trigger ball to release tension in nearby muscles without risking further injury.
Over-Relying on Scans
It’s easy to focus on MRI or ultrasound results, but imaging doesn’t always reflect how your tendon is functioning. Functional progress - like how your tendon responds to activity - matters more. Use these functional markers, along with proper load management, to guide your recovery rather than relying solely on scans.
Mismanaging Load Progression
Your tendon’s ability to handle stress changes throughout recovery and varies from person to person. Understanding your current load capacity is crucial. Gradually increase the intensity and complexity of your exercises in collaboration with your healthcare team. This approach ensures progress without overloading the healing tissue.
Skipping or Inconsistent Exercises
Consistency is everything. Skipping exercises or doing them inconsistently can slow your recovery and increase the risk of re-injury. Treat your prescribed exercises like medication - regular, consistent effort is non-negotiable. If sticking to your routine feels difficult, talk to your physical therapist about adjustments or strategies to stay on track.
Neglecting Long-Term Tendon Health
Focusing only on short-term recovery can lead to chronic issues down the line. Sustainable healing requires attention to both immediate and long-term tendon health. Dr. David Michael Wallace, a Sports Medicine Doctor at Houston Methodist, warns:
“The most important thing to know is that continuing to exercise with untreated Achilles tendonitis can lead to Achilles tendon rupture, which almost always requires surgery.”
Addressing early warning signs and following a comprehensive rehabilitation plan will help you avoid serious complications later.
Conclusion
Preventing an Achilles tendon re-rupture goes beyond just the initial healing phase - it’s about creating a solid foundation for long-term tendon health and resilience. Recovery isn’t simply about getting back to your old routine; it’s about ensuring your tendon is stronger and more prepared for the future.
The key to prevention lies in structured rehabilitation. Studies highlight that a phased, 12-month program - starting with early range-of-motion exercises and advancing to high-impact activities - provides the safest path forward. This gradual approach not only promotes healing but also ensures the tendon is ready for the demands of everyday life and athletic performance.
Another critical element is progressive load management. Tendons need time to adapt to increased stress, and evidence-based programs that incorporate early mobilization and gradual loading have been shown to significantly reduce re-rupture rates. In fact, the difference in re-rupture rates between surgical and non-surgical treatments can drop to just 1.6% when these methods are followed effectively [13].
Lifestyle adjustments also play a major role in recovery. A diet rich in collagen, adequate rest, and maintaining overall fitness all contribute to a stronger, healthier tendon. These elements, paired with expert guidance, help create a well-rounded recovery plan. Remember, every aspect of your rehabilitation journey contributes to the strength and durability of your Achilles tendon.
To support your recovery, professional resources can make a significant difference. Achilles Rupture Recovery provides evidence-based insights to help you understand your healing process and make informed decisions. For specialized equipment, Thetis Medical offers clinician-approved solutions developed in collaboration with orthopedic foot and ankle surgeons. Their detailed FAQ guides - such as those on Achilles rupture timelines and life after Achilles rupture - offer valuable support at every stage of recovery.
Recovering from an Achilles tendon rupture is a long-term process, not a quick fix. By following proven rehabilitation strategies, gradually increasing activity levels, and embracing positive lifestyle changes, you can reduce the risk of re-rupture and rebuild a tendon that’s ready to handle whatever life throws your way.